Blueberry, Blackberry & Soured Cream Cake with Cheese Cake Frosting


Distracted from the books again, but this time in the shape of an amazing cake recipe from the BBC GoodFood website.  This recipe is full of all the right things, but far from healthy, although I do trick myself into thinking a cake like this is good for you… it does contain fruit after all.  Anyway, what’s life without a little indulgence ehe?

This recipe is super easy and looks really pretty too, but most of all it tastes…well…find out for yourself, I swear you WILL love it 😛 oooo and the cream cheese and soured cream frosting with those beautiful little berries as they pop in your mouth….mmmmmhmm….

I wish I had made this cake in the morning to capture an image in the best of the day light, but artificial just had to do as I was definitely not going to let this little beauty tease me until morning.

You can find the recipe here.  The only adjustment I made was reducing the sugar  from 175g to 100g and used half blueberries, half blackberries. The tanginess of the blackberries really balanced out the sweetness of the frosting making it very moreish.

Banana Breakfast Muffins


Last night was a strange one…  Awoken at about 2am, soaking from head to toe and covered in what looked like spangly spiders.  I also remember frantically searching for the light switch saying something (not sure what though) to scare the spiders away….ewwww…it makes me shiver thinking about it.

My head is possibly trying to adjust after all the assignment writing those past few months, or it could be the research methods philosophy I am trying make sense of.  However, I put it down to the head and foot massage I gave Andy last night to relieve him of the stress he was swimming in due to a presentation he has to do today.   Lucky Andy, he slept right though the night, which, for him, is strange.  His energy must have transferred over to me during the massage, but he doesn’t seem to think that’s true.    Anyway, to relieve myself of the light trauma from last nights spider hallucinations, I  decided the perfect solution was to bake cakes for breakfast, just something quick, so thanks to my trustworthy banana cake recipe it saved the day 😛 well, so far…

Hot from the oven…I forgot how good they tasted…would you like one? (by the way, I know what you’re thinking, “is that all she can cook?” … it’s not honest…it’s just that they’re sooo quick to make and absolutely satisfying).

No chocolate this time, and a little less sugar too…oh yeah, and I used half and half wholemeal and plain flour…the healthier option 😛

Hummingbird Cupcakes


Wow! It has been a while, but now I’m back. I am absolutely consumed by my MSc, but more about that another time. What is important is my return to the kitchen. What better way to inject life into my passion for food and baking than experimenting with yummy Hummingbird cake recipes. My wonderful friends Ali n Ali bought me the cookbook for Christmas quite conveniently a little before Mrs Ali’s 30th birthday celebrations 😛 . A great excuse it was too to make some gorgeous red velvet cupcakes and chocolate ginger cupcakes topped off with cream cheese frosting (mmm…yeah… I know they don’t fit into the whole healthy cooking theme I have going here, but it was for a 30th birthday after all). Anyway…My first attempt didn’t go quite to plan, possibly due my uncontrollable need to change every recipe I try out. However, take 2 and 3 were actually not too bad, maybe not as beautiful as those by the experts in Hummingbird bakery, but they did taste pretty good (well, Andy and I thought so anyway).


Chocolate and Ginger

Ingredients:

  • 100g plain flour
  • 2og cocoa powder
  • 140g caster sugar
  • 1 1/2 tsp baking powder
  • a pinch of salt
  • 1 egg
  • 40g unsalted powder
  • 120g whole milk
  • 1 tblsp ginger preserve (this was my addition 😛 – I really couldn’t resist)

Directions: pre-heat oven to 170 degrees C (325 degrees F) Gas 3

  1. put the flour, cocoa powder, sugar, baking powder, salt and butter in a free standing electric mixer with a paddel attachment and beat on slow speed until you get a sandy consistency and everything is combined.
  2. Whisk the milk, egg and vanilla extract together in a jug, then slowly pour out about half into the flour mixture, beat to combine and turn the mixer up to high speed to get rid of any lumps.
  3. Turn the mixer down to a slower speed and slowly pour in the remaining milk mixture (scrape any unmixed ingredients from the side of the bowl with a rubber spatula). Continue mixing for a couple more minutes until the mixture is smooth. Do not overmix.
  4. spoon the mixture into paper cases until 2/3 full bake in a pre-heated oven for 20 -25 min (if using large muffin cases) 15 min (if using small fairy cake cases). Leave cakes to cool on a wire rack then decorate as you please.

Red Velvet

Ingredients: MAKES 12

  • 60g unsalted butter at room temp.
  • 150g caster sugar
  • 1 egg
  • 10g cocoa powder
  • 20 ml red food colouring
  • 1/2 tsp vanilla extract
  • 120 ml butter milk
  • 150g plain flour
  • 1/2 tsp bicarbonate of soda
  • 1 1/2 tsp white wine vinegar

Directions: pre-heat oven to 170 degrees C (325 degrees F) Gas 3

  1. Put the butter and the sugar in a free standing electric mixer with a paddle attachment and beat on medium until well incorporated
  2. in a separate bowl, mix together the cocoa powder, red food colouring and vanilla extract to make a thick, dark paste. Add to the butter mixture and mix thoroughly until evenly combined and coloured. (scrape mixture from the sides of the bowl). Turn the mixer down to slow speed and slowly pour in half of the buttermilk. Beat until everything is well incorporated. Repeat the process until all the buttermilk and flour have been added. Turn the mixer to high and beat until you have a smooth, even mixture. Turn the mixer to a low speed and add the salt, bicarbonate of soda and vinegar. Beat until well mixed, then turn up the speed again and beat for a coupe more minutes
  3. Spoon the mixture into paper cases until 2/3 full and bake in a pre-heated oven for 20 – 25mins (LARGE) 15 min (small)

And the best part, not just a 30th b’day party, but a fancy dress party!! 😀

♡ Chilli Chocolate Slices ♡


White chocolate is marketed by confectioners a...

Image via Wikipedia

Chocolate is my vice, especially on days like these when you have to study.  I will do anything to put me into a mindset to open a 700 page textbook.  Luckily I don’t have to look too far.  A bar of 75% chocolate is all it takes for me.

My morning net search took me to my new favourite food blog ‘My Darling lemon Thyme’ where I found a scrumptious looking chilli chocolate slice recipe.  I can’t wait to try out more of her mouth watering recipes.  Take a look, I’m sure you will all agree.

Like any recipe I want to try out without pre-planning, there are always ingredients you never have.   In this case, I had already finished off the last of my blueberries over breaky so I used some dried fruit, and I have also never bought tapioca flour before so I used 1 1/2 tablespoons of corn flour.  There seems to always be substitutions on hand so the baking commenced and the results were just as I had expected, utterly satisfying.  Now where is that textbook of mine?

Information and image taken directly from My Darling Lemon Thyme’s blog;

chocolate, chilli and blueberry slice
This recipe is gluten-free and can easily be dairy-free by using margarine in place of butter and by making sure you use a good quality dark chocolate that’s dairy-free. I used trade aid dark chocolate. As I’ve mentioned before, get to know your chillies. I used 1 whole long chilli, but you may want to go for less or more depending on how hot you chillies are and how hot you want the end result. If you eat wheat, substitute the rice and tapioca flours for 3/4 cup plain flour or spelt flour.  Makes about 20 slices

  • 200 g dark chocolate, chopped
  • 125 g butter/ margarine
  • 1/2 cup muscovado sugar (or use soft brown sugar)
  • 1 long red chilli, seeded and finely chopped
  • 1 1/2 cups frozen/ fresh blueberries
  • 3/4 cup almond meal/ ground almonds
  • 1/2 cup brown rice flour (white rice flour is fine)
  • 1/4 cup tapioca flour
  • 2 eggs, lightly beaten
  • cocoa powder for dusting

Preheat your oven to 15o degrees/ 275-300 f. Grease yourself a slice pan about 20 x 20 cm. Line the base and sides with baking paper and make sure about 2cm of paper extends up and over the edges of the pan.
Melt chocolate, butter, sugar and chilli together in a small saucepan over low heat. Pour into a large bowl and set aside for 10 mins to cool slightly. Gently stir in flours, almond meal and eggs until combined. Fold through blueberries. Pour mixture into prepared pan and smooth off the top with the back of your spoon/ spatula.
Bake 35-45 mins or until cooked when tested with a skewer. Leave to cool in the pan before cutting into small squares, dusting with cocoa powder and devouring! Or if you have some serious restraint, hold off eating till tomorrow.
NB If using fresh berries I’d say they would take about 30-35 mins. If using Frozen like I did, allow a little longer – mine took 45 mins to cook.
Heavily adapted from a little women’s day cookbook called “Family favourites – easy biscuits and slices”.

Manly Banana Cinnamon Cupcakes


Here you will find my yummy banana loaf recipe in the shape of little manly style cupcakes.  I was going make a traditional cup cake recipe with all the frills and a variety of flavours, but I didn’t!   Instead, I settled on, in my opinion, the perfect sponge.  They are like mini banana loaf buns, however, this time I topped them with a chocolate & cinnamon cream cheese frosting for added naughtiness.  They do look a little manlier than your usual cup cake, don’t they?  So that’s who I made them for, a newly turned 30-year-old man. Welcome to my world!

Happy Birthday Tom!!

Ingredients:

  • 113g butter or margarine
  • 1/2 cup sugar (granulated, caster, or mix in some demerara, whatever you have to hand)
  • 1 cup self raising flour (I couldn’t find self raising here in Japan so used all purpose)
  • [1.5 tsp baking powder & 1/2 tsp salt] – if you use all purpose
  • 2 eggs
  • 3 medium, very ripe bananas
  • Handful crushed walnuts
  • 1 tsp heaped cinnamon
  • 1/2 tsp clove powder
  • 1 tsp nutmeg powder
  • 1 bar of chocolate (broken into small pieces)
  1. Pre-heat oven to 130 degrees
  2. Grease a muffin tray with butter or marg
  3. Mash the bananas with a sturdy fork or blend in a blender
  4. Cream the butter and sugar together and mix in the eggs
  5. Mix together the mushy bananas.
  6. Mix in the sieved flour and spices
  7. Mix in the chocolate raisins and crushed walnuts.
  8. divide evenly between muffin holes and bake for 40 minutes
  9. check for they’re by piercing the center of a cup cake. If it comes out clean, cool at room temperature then decorate as desired.

While I Was Away


It has been a little over a month now since returning to Scotland.  Here is what I have cooked/ate whilst I have been AWOL from Bendi Benri.

Feeling a lot more settled in now I am ready to embark on my new life as a student AGAIN and get back into creating more yum.

Enjoy!

First up, home-coming welcome dinner, beautifully and deliciously prepared by my wonderful mother.  It is very clear to me now that my mum is the source for my desire to cook.  She effortlessly manages to put on amazing wholesome spreads.  What a mum.

Nutty Chocolate Brownies (heaven in your mouth) & Scones with Home made Jam
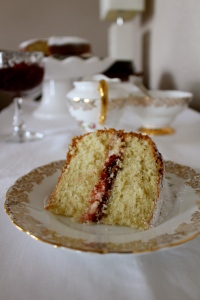
Victoria Sponge

prawn & avocado cocktail

Home Made Steak Pie

Home Made traditional Scottish Oatcakes

What I forgot to capture was the Ultimate Chocolate cake smothered in Ganache! I am gaining pounds just thinking about it! I swear that cake was to die for! Here’s a link to the recipe.

A flying visit home then back to Edinburgh to meet Izumi and Sofie, friends we met in Japan.  They had never tasted Haggis before, so Andy and I decided to take them to Urban Angel to give it a try.  I love the concept of this Restaurant, stylish and delicious, “using the best local, organic, free-range and fairly traded produce available.”

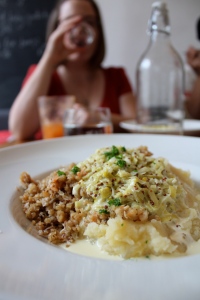
To follow I visited a three-day foodies festival, filled with freebies of scrumptious organically prepared fresh food from all over the country.  Some healthy and some just down right naughty!  I was in my element.

Salmon and potato pie!

Tiger Prawn Paella

Feeling inspired from my weekend boozing and munching, I bought a nice big bunch of fresh beetroot and put together a yummy beetroot cake smothered in cream cheese icing.  Here’s the recipe I used.  Yep, I AM growing by the day! Twice the size I was a month ago. Oops!

No time to break just yet.  The Edinburgh festival brought my folks and brother up to Edinburgh.  The weekend consisted mainly of indulgence and laughter. Good times!

Below we eat at Amore Dogs another very trendy restaurant serving Italian scrum.

tuna nicoise salad on the side of a grilled sea bass on a bed of baked tomatoes.
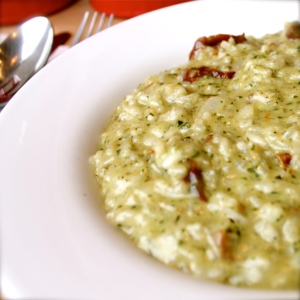
Goats Cheese & Sun dried tomato Risotto

Wow what a month.  Loved every minute!

I really miss Japan and crave a lot of the food we ate whilst we lived there, especially Soba noodles, so I treated us to a yummy crispy tofu soba dish.   Satisfying beyond expectation! Go me!

Ingredients; serves 2 if you really have to share.

2 portions of soba noodles

150g Tofu (drained and cut into cubes)

1 small red onion (sliced into half moons)

1 stick of celery

around 12 sugar snap peas (halved)

2 cloves garlic

Juice from 1/2 a lemon

1 T light soy sauce

1 tsp pure honey

1 T chopped fresh basil

1/2 teaspoon chilli (from the jar or fresh)

2 T olive oil

2 tsp vegetable powdered bullion

2 T corn flour

Directions:

1.  prepare all ingredients

2. evenly coat the tofu in the corn flour

3.  heat up the olive oil in a wok or frying pan then add the tofu.  When coloured a reddish brown remove from the pan and place on some absorbing kitchen paper

4. In the same pan add the onions and garlic and cook until translucent

5. add the all of the other ingredients except the soba and basil and lemon then stir through on a medium heat.

6. In the mean time boil the soba until just tender then rinse quickly under cold water to avoid over cooking.

stir through the noodles, tofu, basil and lemon juice to the vegetable mixture then serve in warm bowls.

To finish, here is yesterdays lunch…

Chilli Squash Soup accompanied with rice crackers topped with cheddar cheese (hello my long-lost naughty friend) and cranberry sauce. yummmm…..

Ingredients; serves 4-6

I small butternut squash

4 sticks of celery

1 yellow onion

3 cloves of garlic

50g low fat soft cheese

2 tsp vegetable bullion

Directions:

1.  Saute the onion and garlic until translucent

2.  In the mean time bring a med/large pot of water (2 litre) the boil

3. cut the squash into cubes then allow to boil until tender

4.  when the squash is ready add all other ingredients except the cream cheese, then mix through

5. Turn off the heat then use a hand held blender to pulse the mixture until smooth(ish) stir though the cream cheese then serve in warm bowls

Entered the XXX world. So far so good.


So far the world of the XXXs has been non stop so far.  I love it!  However, it has torn me away from the blogging world, which will most definitely commence with some tasty summer dishes.  I have some lovely, healthy and simply delicious ideas up my sleeve all thanks to Andy gifting me with an inspiring cookbook.  So, please stay tuned to find out what Benri will come up with next.  let’s just hope my cooking improves.  My new age resolution is to be more consistent with successes as opposed to flops.  I’ve seen way too much of those the past few weeks.

My lack of posts hasn’t got anything to do with failures in the kitchen.   It’s just that I have been lucky enough to have the most wonderful friends and Boyfriend who have indulged and spoiled me with afternoons of lunching and evenings of sushi.   I love you guys.

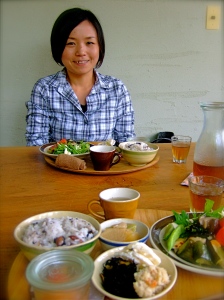
What I love about country life in Japan are the hidden gems of cafes amongst the rice paddies.  I have lived here in Kochi for a little over a year now and can’t believe I have never visited this cafe until now. What’s more annoying is that it’s only a 30 min walk from my apartment!   Take a look, this is the cutest little cafe.

Another bonus is that the chef and owner is an amazing cook.  Her dishes are Japanese in style and ingredients, but quite European in taste.  You can see she is heavily influenced by Scandinavian and old English design.  There is such attention to detail in every corner of this wonderful little place.

Anyway, my lovely friend Chisako and I spent the afternoon here indulging on the cafes scrumptious delights.  If only every day could be a sunny cafe day.

Happy Birthday to me ♥

Aubergine isn’t the twist!


Oh oh..Opened the fridge!!  had a wee taste.  The opposite of miracle happened.

I’m worrying that writing about failures doesn’t exactly entice folk to want to cook what you cook, does it? I usually only post what I feel is worthy, but I really am at odds about this whole cake making malarkey.   Especially this aubergine one.  I was wondering why I couldn’t find enough eggplant recipes to prove it’s ok to go ahead with this one….ahhh why am I getting so worked up about it? It’s only a cake!  EXACTLY that’s it, it’s because it’s a cake! If you chose to eat cake, you have to make it worth it! You have to justify why you went over your calories. Don’t you?  It has to be amazing, the best you have ever eaten!  Don’t you agree?

Ok, so, I always enjoy incorporating a twist to my cake making. It’s the justification thing. I want to stay healthy and I know a lot of folk out there do to, so I love that twist, that twist of healthiness, but eggplant isn’t the twist for me. Especially not in cake.

Perhaps it’s the skin?

Sorry Aubergine! Not this time.

Purple Birthday Cake


Since last weekends little disaster, I have felt a little shy in the kitchen and uninspired to experiment.  I know every disaster can only lead to a better success, but I just can’t seem to find the will power.

However, I think I’ve finally come to the decision on which birthday cake I should try to make for my 30th.  I found it here, but super surprised by the colour the egg plants give to the cake.  I’m not completely convinced they will make my cake as vibrant a purple as you see in the image, so I thought that if I purée 200g of blueberries and add it to the batter they may produce a vibrant colourful cake.  I’m not too sure though.  I’m a little worried the cake will turn out a washed out grey colour.  Only one way to find out!

If you know what the results might be, please post your advice.  I will appreciate any help I can get.

I really want this cake to look and taste impressive.

I’m so excited it’s almost the weekend.  I know it’s a pretty scary birthday to celebrate, but I’m actually really looking forward to it. It is only a number after all.  Another excuse to splash out on some Champagne :D.

Anyway, here is the recipe I’m gonna try out tomorrow night for Sat.  Please advise if you know it definitely won’t work.

Eggplant and blueberry Cake Ingredients:

  • ½-cup margarine
  • ¼-teaspoon salt
  • ½-cup sugar
  • 1-teaspoon baking powder
  • ½-cup honey
  • 1-teaspoon cinnamon
  • 2 egg whites
  • pinch of nutmeg
  • 2 cups grated eggplant
  • 200g frozen blueberries
  • ½-teaspoon ground cloves
  • 1½-cups white flour
  • 1-cup nuts (optional)

Frosting

  • 3 ounces cream cheese
  • 2 tbsp honey
  • 100g white chocolate

Directions:

  1. Preheat the rice cooker on cake setting to 55min.
  2. Cream the margarine in a medium-sized bowl until soft and whipped, then add the sugar and honey until mixture is light and fluffy.
  3. In another bowl sieve the flour, salt, baking powder, cinnamon, nutmeg, cloves, and nuts to thoroughly combine.
  4. Blend the frozen blueberries until smooth.
  5. Stir the grated eggplant and the blueberry purée into the butter/sugar/honey mixture
  6. Add the flour mixture to the sugary butter mixture and combine by hand to incorporate just until the flour has mixed in.
  7. In a separate bowl whisk the egg whites to a firm peak then fold into the batter.
  8. Pour the mixture into a cake pan and bake for about a half hour to forty-five minutes, or until a toothpick comes out clean.
  9. This cake can be topped with cream cheese-vanilla icing made with a mixture of 3 ounces of cream cheese and 1 cup of confectioners’ sugar, and 1 T of vanilla. Drizzle the icing over the cake and then top with a light sprinkle of nutmeg.  (I’m going to try a cream cheese and white chocolate frosting)

Rice Cooker Blueberry & Lemon Cream Cheese Pound Cake.


I have tried to decide on a cake to bake for my big birthday night out on Saturday.

Here’s the criteria;

  • I’m not so fussed about it being healthy.  If it is then it’s a bonus.
  • I want it rich and decadent
  • Delicious
  • Amazing
  • Beautiful
  • colourful
  • Not too delicate as it has to travel 45 minutes to the restaurant.

My first thought was a red velvet cake due to its boldness in colour and style.  Unfortunately  none of my local supermarkets stocked enough red food colouring, so that was that option out of the window.  I actually can’t seem to justify using so much food colouring either.  They do look really pretty though.

Do you think the cake would turn a beautiful purple if I used grated aubergine skins and blueberry purée?

Anyway, whilst I was rummaging around other foodies blogs I stumbled upon a beautiful blueberry sponge cake with cream cheese frosting, which looked toooo good to pass by.   This one was quickly marked in my favourites.

The cream cheese in the frosting of this recipe reminded me that I have always wanted to try out a baked cheese cake recipe in my rice cooker.  You see, baked cheese cakes here in Japan are the best you will try.  They are so simple, containing the main flavours, cheese and the zest of lemon, but they just look too plain for a 30th birthday party.  I have never really liked the biscuit bases in the ones I have tried before and the filling is always too creamy for me.  However, they do look colourfully impressive, with all the various combinations of fruit don’t they?

Decisions, decisions.  Cheese cake or blueberry cake???

So, I thought, why not join both cake ideas?  It would have been too much of a risk experimenting on the friday night before the big night out, so today is the day the cake experimentation began.

The results?  So far so good.  It has risen at least, and looks promising.  I am now waiting for it to cool completely before taking it out of  ‘Benri’ for a photo shoot.

Ok, the results are in.  Just as I thought.   A superficial disaster!!  I will say this though, it is absolutely delicious.   Try out the recipe in a regular oven, it is yummy.

I’m going to try this one again, but not using a ring tin next time.  My tin was useless. It wasn’t stick proof and wasn’t greased enough 😦 I think I’ll save it for the fruit terrines in future.

At least you can always rely on the sun to make any disaster look pretty, ehe?

For the cake, which is beautifully rich and lemony, here’s the recipe.

Ingredients

  • 200g cream cheese, at room temperature
  • 2 tbsp whole milk
  • 1 cup superfine sugar (caster sugar)
  • 1 1/2 tsp baking powder
  • 1/2 tsp baking soda
  • 2 eggs, separated
  • 1 1/2 cup all purpose flour
  • juice and zest from  lemon juice
  • 1 tsp apple cider vinegar
  • 100g butter
  • 1 cup blueberries (fresh or frozen)

Directions

  1. Pre-heat your rice cooker on the cake setting.
  2. Grease the rice cooker pan with butter or oil.
  3. sift the flour 3 times, on the 3rd time sift in the baking powder and soda
  4. Beat cream cheese with milk to soften.
  5. mix the butter and sugar together until fluffy
  6. Add the egg yolks then mix until smooth.
  7. mix in the cream cheese mixture, vinegar and the lemon juice & zest to the butter mixture
  8. In a separate bowl, beat egg whites until fluffy.
  9. Gradually fold beaten egg whites into the cream cheese mixture, stirring gently.
  10. mix in the blueberries
  11. Pour into the bundt cake tin (make sure it fits in your rice cooker first) then insert the tin into the rice cooker pan and smooth the surface.
  12. Bake 35-40 minutes, until a pick inserted in the middle of the center comes out clean.
  13. be careful not to open the lid until it has been in the oven for at least 20 minutes.